In today’s digital age, having a professional and functional website is crucial for businesses, entrepreneurs, and individuals alike. Microsoft Copilot, an AI-powered assistant, revolutionizes the website creation process, making it quick, easy, and efficient. In this blog, we’ll guide you through the steps to create a Power Pages site in just minutes using Copilot.
Why choose Power Pages?
Power Pages is part of the Microsoft Power Platform, which integrates seamlessly with other Microsoft services like Power BI, Power Apps, and Power Automate. This integration allows you to create a cohesive digital ecosystem, enhancing your site’s functionality and user experience.
Creating a website can seem like a daunting task, but with Copilot, you can have a professional site up and running in no time. Follow these simple steps to get started:
Step 1: Get Started
Begin by accessing the Power Pages platform. Sign in with your credentials, or create a new account if you don’t have one. Once logged in, you’ll be greeted with an intuitive interface that guides you through the process.
Step 2: What industry are you creating a website for?
Select the industry that best fits your website’s purpose. This helps Copilot tailor the site to your specific needs, ensuring that the design and functionality align with industry standards.
Step 3: Describe the site you want and let Copilot build it.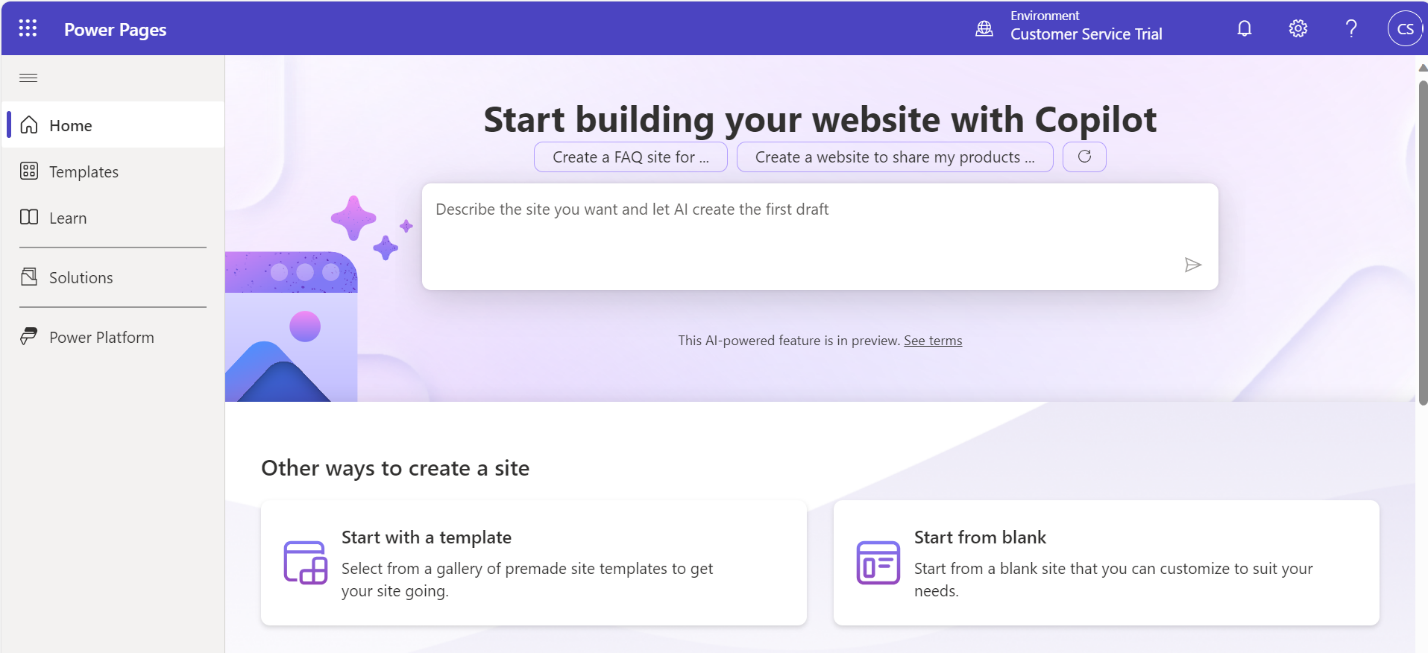
Provide a brief description of your site’s purpose and goals. This is where you outline what you want your site to achieve. Once you’ve described your vision, let Copilot work its magic to generate a basic structure and design for your site.
-
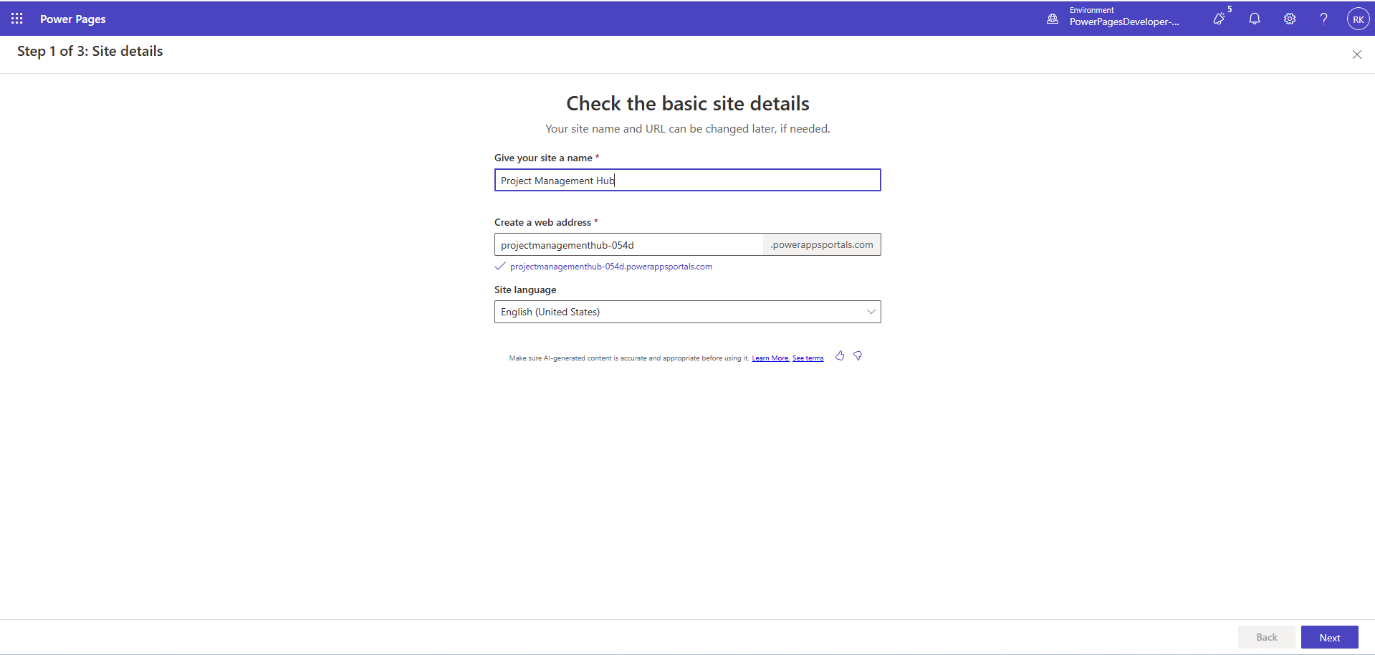
Check the basic Site Details:
Review the initial site details generated by Copilot. Ensure all the basic information, such as your site name, web address, and Site language any other essential info, is accurate and complete.
-
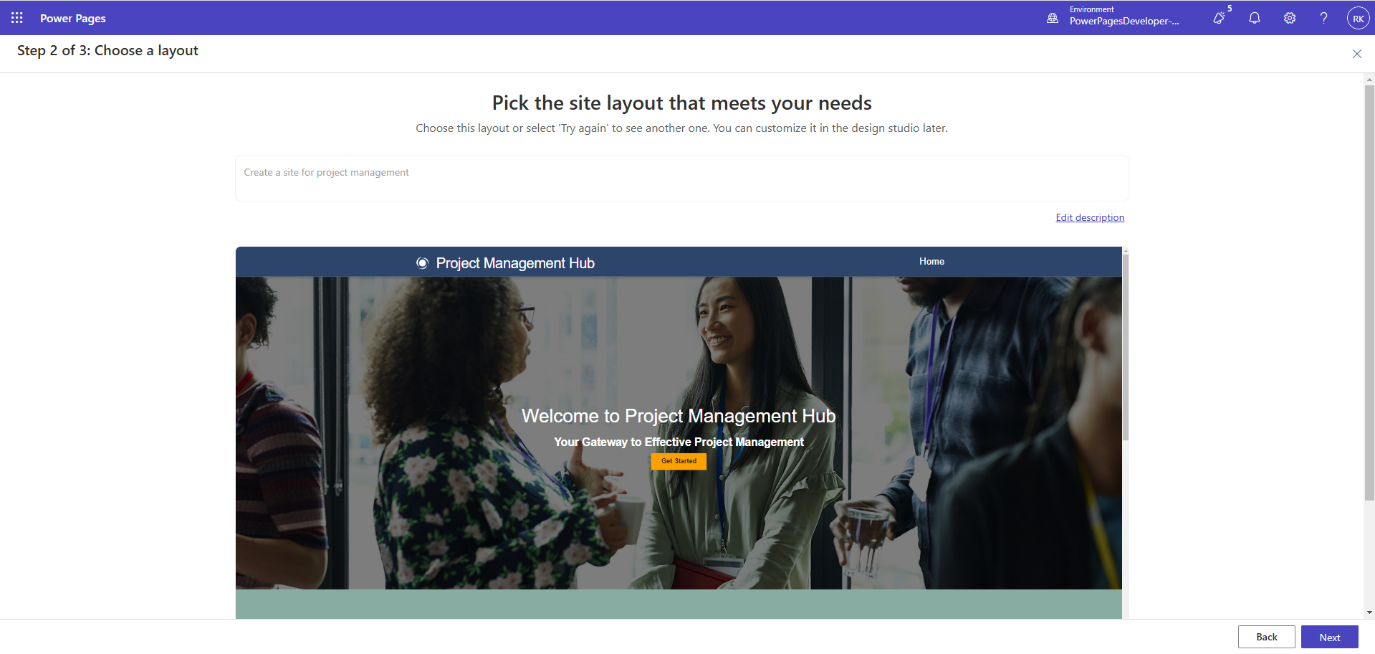
Pick the site layout that meets your needs:
Choose from various layout options provided by Copilot. Select the one that best suits your content and design preferences. Copilot offers a range of templates that are both visually appealing and functional.
-
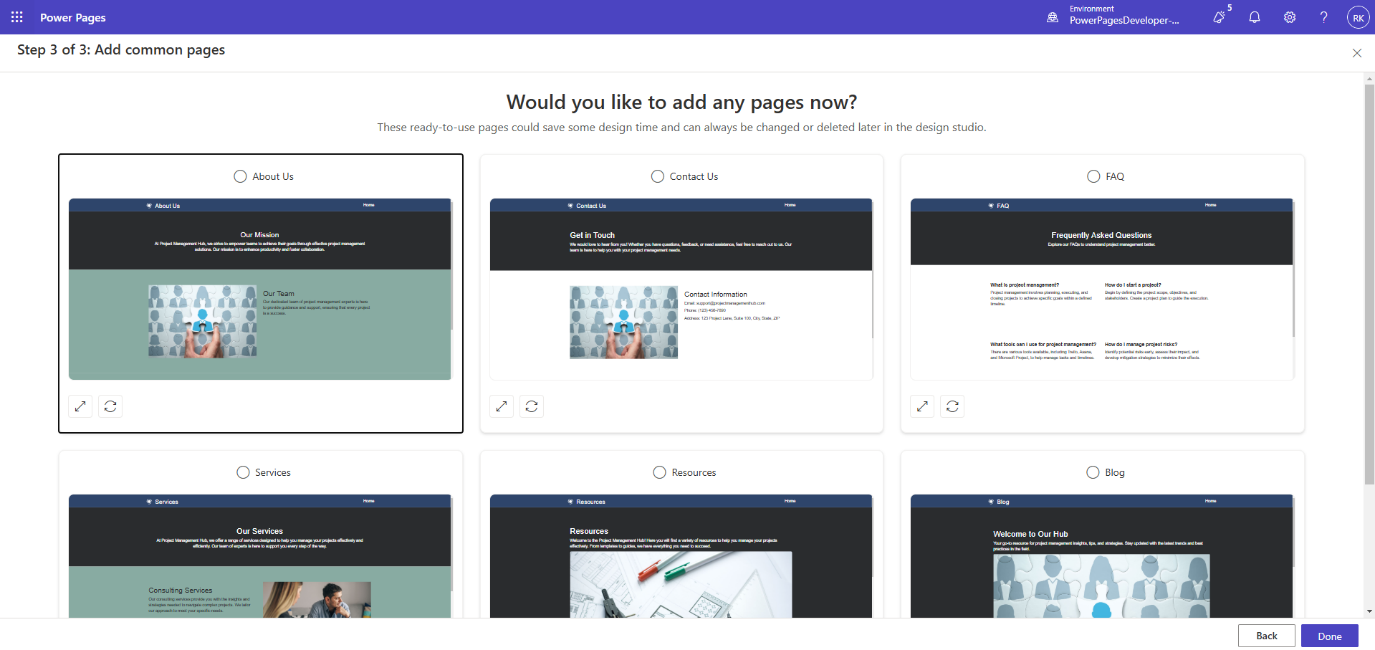
Would you like to add any pages now?:
Decide if you want to add additional pages to your site. Specify the type of pages you need, such as About Us, Contact, Services, or any other relevant sections. This step allows you to expand your site’s content and provide more information to your visitors.
-
Add or edit sections and Preview Mode view:
Customize sections of your site by adding or editing content. Use the preview mode to see how your site looks before publishing. This feature allows you to make any necessary adjustments and ensure everything is perfect before going live.

Step 4: Publishing Your Site
Once you’re satisfied with your site’s design and content, it’s time to publish. Copilot guides you through the publishing process, ensuring your site is optimized for search engines and mobile devices. With just a few clicks, your Power Pages site will be live and ready to impress your audience.
Conclusion
Creating a Power Pages site has never been easier, thanks to Microsoft Copilot. By leveraging AI technology, Copilot streamlines the website creation process, allowing you to focus on what matters most – your content and your audience. Give it a try and see how quickly you can create a stunning website with Copilot! By following these steps, you’ll have a fully functional and professional-looking website in minutes. Copilot makes the process easy and efficient, allowing you to focus on what matters most – your content and your audience.
🚀 Let’s build something amazing together! 🌟 Contact Peafowl IT Solution to create a stunning, custom website using Power Pages ⚡ — perfectly tailored to your business needs. 💻