Power Pages empowers you to build engaging, data-driven websites. But sometimes, the out-of-the-box components just don’t cut it. That’s where custom components come in, allowing you to extend functionality and tailor the user experience to your exact needs. If you’re comfortable with Visual Studio and web development, you can unlock a whole new level of customization.
Why Custom Components?
- Enhanced Functionality: Implement features beyond the standard offerings, such as interactive maps, specialized data visualizations, or unique user input mechanisms.
- Tailored User Experience: Design components that perfectly match your brand and provide a seamless, intuitive experience for your users.
- Integration with External Services: Connect your Power Pages site with external APIs and services to retrieve and display data in custom ways.
- Reusability: Build components that can be used across multiple pages and even multiple Power Pages sites, saving you time and effort.
Prerequisites
Before you begin, ensure you have the following:
- A Power Pages site.
- Visual Studio with the necessary extensions (Power Platform Tools).
- Visual Studio Code with the Power Platform Tools extension.
- Node.js and NPM (Node Package Manager).
- Basic understanding of HTML, CSS, and JavaScript/TypeScript.
- Power Platform CLI.
Step 1: Set Up your Environment
Install Visual Studio Code:
- If you haven’t already, download and install Visual Studio Code from the official website.
Install Power Platform Tools Extension:
- Open Visual Studio Code.
- Go to the Extensions view by clicking on the Extensions icon in the Activity Bar on the side of the window.
- Search for “Power Platform Tools” and install the extension.
Step 2: Create Your Custom Component
Create a New Project:
- Open Visual Studio Code and create a new folder for your project.
- Open the folder in Visual Studio Code.
Add Your HTML, CSS, and JavaScript
- Create a new HTML file (e.g., MyCustomComponent.html) and add your HTML structure.
- Create a new CSS file (e.g., styles.css) and link it to your HTML file.
- Create a new JavaScript file (e.g., script.js) and link it to your HTML file.
Step 3: Deploy Your Component
Deploy to a Web Server:
- Deploy your custom component files to a web server or a cloud service like Azure.
- Ensure your component is accessible via a URL.
Step 4: Integrate with Power Pages
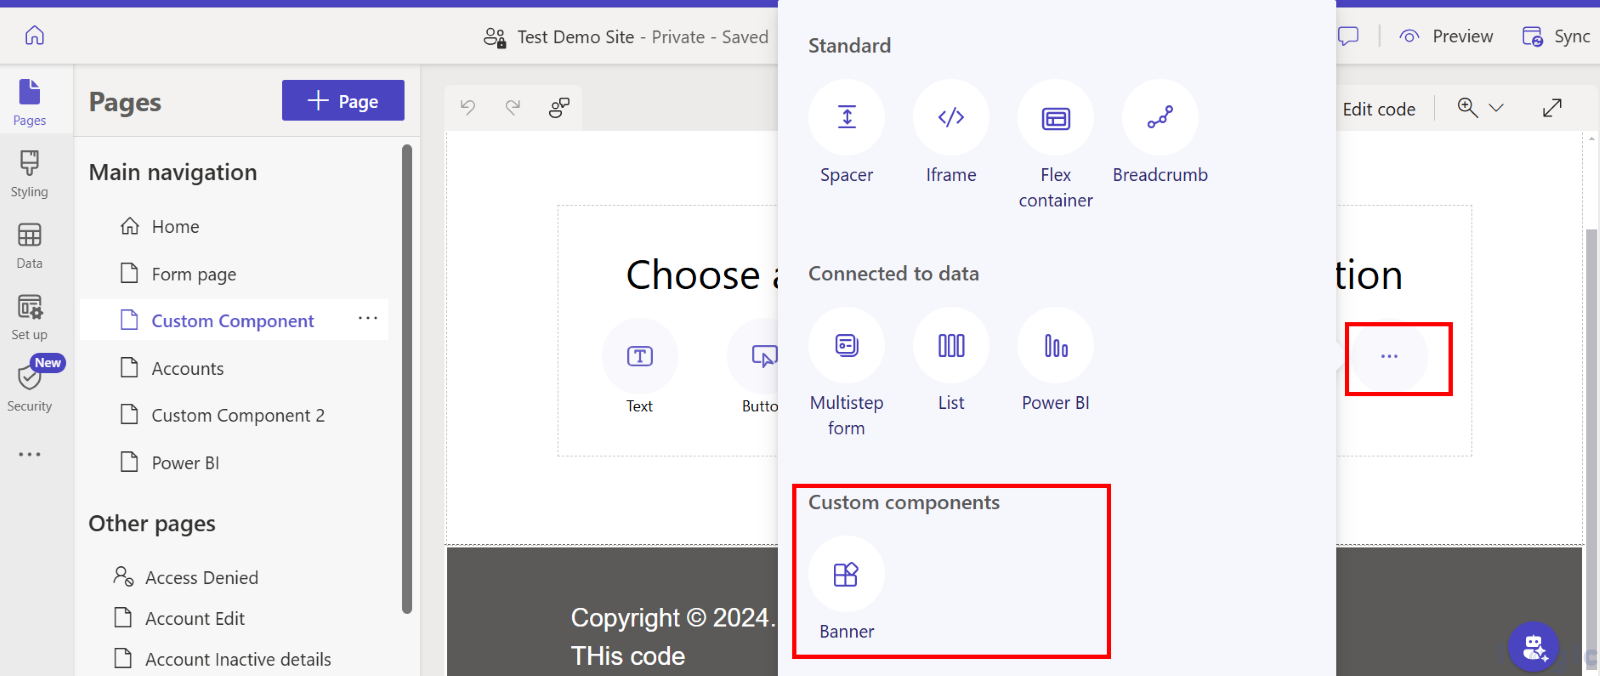
Add Custom Component to Power Pages:
- Open the Power Pages design studio.
- Navigate to the Pages workspace and select the page where you want to add your custom component.
- Add a new section or select ellipses and choose Custom Component.
- Enter the URL of your deployed component.
Step 5: Test and Iterate
Preview Your Page:
- Preview your page in Power Pages to see your custom component in action.
- Make any necessary adjustments to your HTML, CSS, or JavaScript in Visual Studio Code and redeploy as needed.
Conclusion
Creating custom components for Power Pages empowers you to build highly customized and engaging websites. By leveraging your web development skills and the Power Platform CLI, along with the flexibility of Visual Studio and Visual Studio Code, you can extend the functionality of Power Pages and create unique user experiences.
Start exploring the possibilities of custom components and take your Power Pages sites to the next level!
🌟 Ready to elevate your website with custom Power Pages components? 💡 Let Peafowl IT Solution bring your vision to life — crafting dynamic, user-friendly, and fully customized web experiences. 🚀 Contact us today and let’s build something extraordinary! 💻